
Salads
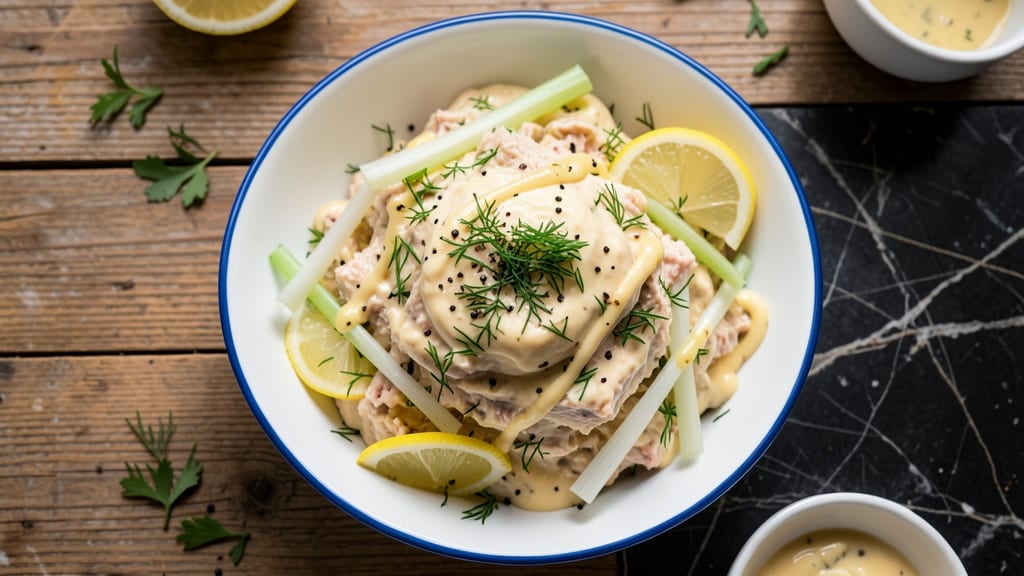
That first bite of Blimpie's signature tuna salad sandwich—crispy bread, creamy tuna, and celery crowns—is a nostalgic comfort food experience you can now recreate at home. The secret lies in balancing fresh dill, finely chopped celery, and carefully seasoned tuna that stays moist without being soggy.
This isn't just another tuna salad; it's a textural masterpiece with every element in perfect harmony.
What sets this recipe apart is the attention to detail that makes it taste like the original: crisply toasted bread, a tuna mixture that's neither too dry nor too wet, and the iconic celery crowns that add satisfying crunch.
The dill brings freshness while the lemon juice brightens the flavors, creating that signature tang you remember. Most importantly, this version delivers the same restaurant-quality experience without the drive-thru wait.
By the time you assemble your sandwich, you'll have perfectly seasoned tuna salad with celery that stays crisp, bread that's golden and crunchy, and a balance of flavors that hits all the right notes.
The key is letting the salad chill for at least 30 minutes before assembling—this allows all the flavors to meld together while keeping that essential crunch. Every bite will transport you back to that familiar sandwich shop experience.
Whether you're making this for a quick lunch or preparing for a sandwich party, the same principles apply: fresh ingredients, proper seasoning, and that perfect bread-to-salad ratio.
The recipe scales easily too, so you can make enough for the whole family. Let's get started on recreating this classic that's been satisfying customers for decades.
Ingredients for blimpie tuna salad
Fresh dill, crisp celery, and perfectly seasoned tuna—this is your shortcut to Blimpie's iconic sandwich.
| Ingredient | Amount | Notes |
|---|---|---|
| Canned Tuna in Water 🐟 | 2 cans | High-quality, drained well |
| Fresh Dill 🌿 | ⅓ cup | Finely chopped, stems removed |
| Celery Sticks 🧅 | 2 whole | Finely chopped, crisp |
| Mayonnaise 🥫 | ½ cup | High-quality, full-fat preferred |
| Lemon Juice 🍋 | 1 tbsp | Freshly squeezed, bright |
| Yellow Mustard 🌶️ | 1 tbsp | Dijon or regular |
| Salt 🧂 | ½ tsp | Diamond Crystal preferred |
| Black Pepper 🌶️ | ¼ tsp | Freshly ground |
| Sugar 🍚 | ½ tsp | Fine granulated |
| White Bread Loaf 🍞 | 1 whole | Crusts removed, sliced |
| Unsalted Butter 🧈 | 2 tbsp | Softened for toasting |
| Olive Oil 🫒 | 1 tbsp | For bread brushing |
The tuna is where the magic happens. Grab high-quality canned tuna in water—none of that oil-packed stuff here, it gets too heavy. Wild Planet or Starkist are my go-tos, but any good brand works. Fresh dill is non-negotiable for that signature tang, so skip the dried stuff. Grow your own or grab a bunch from the grocery store's refrigerated section—it makes all the difference. Celery should be crisp, not rubbery, so look for bright green stalks with no browning. If you're prepping ahead, store the chopped celery in a sealed container with a paper towel to keep it crisp for up to 3 days.
No fresh dill? Dried dill at half the amount works in a pinch, but it won't taste the same. Out of mayonnaise? Greek yogurt mixed with a little olive oil gives you that creamy texture without the heaviness. The sugar might seem odd, but it balances the tang from the lemon juice—don't skip it. For the bread, sourdough or a soft white loaf works best. If you're feeling fancy, toast the bread with a mix of butter and olive oil for extra crispiness. The key is letting the salad sit for at least 30 minutes before assembling—this lets all the flavors meld together perfectly.
This tuna salad keeps well for 3-4 days in the fridge, though the celery will start to soften after a day. Portion into small containers if you're making it ahead for sandwiches—it's perfect for meal prep. The bread stays fresh for 2 days if wrapped tightly, but I recommend toasting it fresh before serving. For extra crunch, store the celery crowns separately and add them right before eating. Leftovers? Toss them into wraps or crackers for a quick snack—just add a squeeze of lemon to revive the flavors.
Why You'll Love This Recipe
- Pantry-to-plate speed: I swear, this is the kind of recipe that feels like cheating—just drain the tuna, chop celery (three sticks max), fold in mayo and dill, and boom. The lemon juice ties it all together in seconds, no fancy techniques required.
- Bright, tangy punch: That fresh dill and zesty lemon juice cut through the richness of the mayo, giving it a refreshing lift. Honestly, it’s the kind of flavor that makes you forget it’s just canned tuna—crisp, herby, and just salty enough to keep you reaching for more.
- Lunchbox legend: Between us, this is my go-to for packed lunches—holds up perfectly for days without getting soggy. Toss it in a container with crackers or roll it up in a tortilla, and suddenly you’ve got a meal that’s actually exciting to eat.
- Budget-friendly hero: Canned tuna and celery? That’s a fraction of the cost of pre-made salads, and it stretches for ages. I’ll be real: I’ve had this last in my fridge for five days, and it’s still the star of my sandwiches—no waste, all flavor.
Step-by-step instructions for Blimpie tuna salad
Here's how to craft that iconic Blimpie tuna salad with perfect texture and bold flavor.
Prepare the Celery Crowns
Remove the crusts from the white bread loaf and slice it into ¼-inch thick pieces. Arrange the slices in a single layer on a baking sheet and brush both sides lightly with the 1 tablespoon olive oil. This creates a subtle barrier that prevents the bread from becoming soggy when toasted.
Toast the bread in a 375°F oven for 8-10 minutes until the edges are golden brown and the centers are just warmed through. Watch carefully—over-toasting will dry out the bread. Let the toasted slices cool completely before stacking them to form crowns. This crispy base is what gives Blimpie's tuna salad its signature crunch.
Mix the Tuna Salad Filling
In a medium bowl, combine the 2 cans Canned Tuna in Water (drained thoroughly) with the 0.33 cup Fresh Dill and 2 whole Celery Sticks (finely chopped). Use a fork to break up any large tuna chunks while preserving some texture for that authentic Blimpie bite. The celery should be chopped into small, pea-sized pieces to distribute evenly throughout the salad.
Add the 0.5 cup Mayonnaise, 1 tablespoon Lemon Juice, 1 tablespoon Yellow Mustard, 0.5 teaspoon Salt, 0.25 teaspoon Black Pepper, and 0.5 teaspoon Sugar. Mix gently but thoroughly with a silicone spatula, just until all ingredients are evenly combined. The sugar might seem unusual, but it balances the acidity of the lemon and enhances the overall flavor profile.
Assemble the Tuna Salad Crowns
Spread approximately ¼ cup of the tuna salad mixture onto each toasted bread slice. Use the back of a spoon to create an even layer that reaches within ½ inch of the edges. This prevents the filling from spilling out when you add the top slice.
Top each slice with another piece of toasted bread to create a sandwich. Press down gently but firmly to help the filling adhere. For extra security, you can lightly toast the assembled crowns in a skillet over medium heat for 1-2 minutes per side until they develop a golden crust. This step isn't mandatory but adds that classic Blimpie presentation.
Prepare the Butter for Serving
In a small saucepan, melt the 2 tablespoons Unsalted Butter over low heat until it's completely liquid but not browned. This butter will be served on the side for dipping—it's a signature element of Blimpie's tuna salad experience that adds richness to every bite.
Transfer the melted butter to a small ramekin or shallow dish and let it cool slightly before serving. The contrast of the warm, buttery dipping sauce with the cool tuna salad creates a satisfying texture experience that's quintessential to this recipe. Serve the tuna salad crowns immediately while the bread is still crisp and the filling is fresh.
Pro Tips For Making Blimpie Tuna Salad
- Drain & Pat Dry: Tuna straight from the can is a swamp. Drain it thoroughly, then press it between paper towels to remove every last drop of water—this keeps your salad from turning into a soggy mess, especially when mixed with mayo.
- Chop Celery Fine: Skip the thick sticks. Dice the celery into tiny cubes—think rice-sized—so it blends smoothly into the tuna instead of leaving crunchy surprises. (Yes, even if it looks weird at first.)
- Mix Mayo Last: Add the mayonnaise after everything else. Tuna releases water, and mayo absorbs it like a sponge. Waiting until the end keeps your salad creamy, not watery. Stir gently—overmixing turns it into tuna paste.
- Zest Lemon First: Toss the zest into the bowl before the juice. It adds a bright, aromatic punch without overpowering. (And if you’re lazy, just grate the peel—no need for a zester.) The flavor is more layered than just a splash of juice.
Essential equipment for this recipe
Bread Prep Tools
You'll need a sharp bread knife or serrated knife to slice your loaf into even ¼-inch thick pieces—this is crucial for perfect toasting. I recommend a Japanese pull knife like the Victorinox 5-inch for clean cuts without crushing the bread.
For toasting, a baking sheet with a wire rack (to prevent sogginess) works best, or use a light-colored half-sheet pan for even heat distribution. 🍞
Tuna Mixing Essentials
A medium mixing bowl with a silicone spatula is ideal for combining ingredients without breaking down the tuna too much. I use a OXO Good Grips spatula because it's gentle on delicate ingredients.
For chopping celery, a sharp chef's knife and cutting board are non-negotiable—mandoline slicer for celery crowns if you want that restaurant-style precision. A measuring spoon set ensures accurate seasoning, especially for that ½ teaspoon sugar that balances flavors.
Butter Melting Setup
Melt butter in a small saucepan with low-medium heat—never high, or it'll burn. I prefer a stainless steel saucepan (like All-Clad) for even heating. For serving, a ramekin or shallow ceramic dish keeps butter warm and ready for dipping.
Pro tip: Use a thermometer to monitor butter temp at 160°F—this ensures it's liquid but not greasy. 🧈
Chilling & Storage Gear
An airtight container (like Glasslock) keeps your tuna salad fresh for 3-4 days in the fridge. For celery crowns, store them separately in a paper towel-lined container to maintain crispness.
A small skillet (8-inch) is perfect for lightly toasting assembled sandwiches if you want that golden crust. For meal prep, portion control containers help manage portions perfectly.
Optional Pro Upgrades
Want to take it to the next level? A mandoline (like Borg 1500) creates uniform celery crowns every time. For texture control, a food processor (pulse setting) chops celery finely without over-mixing.
A digital thermometer (like Thermoworks Thermapen) ensures perfect bread toasting at 375°F. These aren't required, but they make the process smoother. 💡
Nutrition facts
Frequently asked questions about Blimpie-style tuna salad
Why does Blimpie tuna salad have sugar in it?
The ½ teaspoon sugar balances the bright acidity of the lemon juice and enhances the dill flavor. It rounds out the sharpness of the celery and tuna, creating that signature Blimpie taste. Without it, the salad can taste overly tangy or one-dimensional.
How do I keep the celery from getting soggy in the tuna salad?
Chop celery into pea-sized pieces and add it to the tuna mixture just before serving. For extra crunch, store chopped celery separately in a sealed container with a paper towel. Also, let the tuna salad chill for at least 30 minutes before assembling—this helps the flavors meld without breaking down the celery texture.
Can I make this tuna salad ahead of time?
Yes! Prepare the tuna salad mixture up to 3 days ahead and store it in an airtight container. Keep the celery crowns separate until serving to maintain crispness. The bread should be toasted fresh or lightly warmed just before assembling. For best results, let the salad sit at room temperature for 10-15 minutes before eating to revive the flavors.
What's the best way to toast the bread for maximum crunch?
Toast slices at 375°F for 8-10 minutes until golden brown. For extra crispiness, brush with a mix of butter and olive oil before toasting. Let the bread cool completely before assembling—warm bread absorbs moisture from the tuna salad, making it soggy. Pro tip: Use a wire rack in your oven for even toasting.
Can I substitute Greek yogurt for mayonnaise?
Mix ½ cup Greek yogurt with 1 tablespoon olive oil for a lighter version. This keeps the salad creamier while reducing fat. You may need to add an extra ½ teaspoon lemon juice to compensate for the yogurt's natural tang. The texture will be slightly different but still delicious.