
Side Dishes
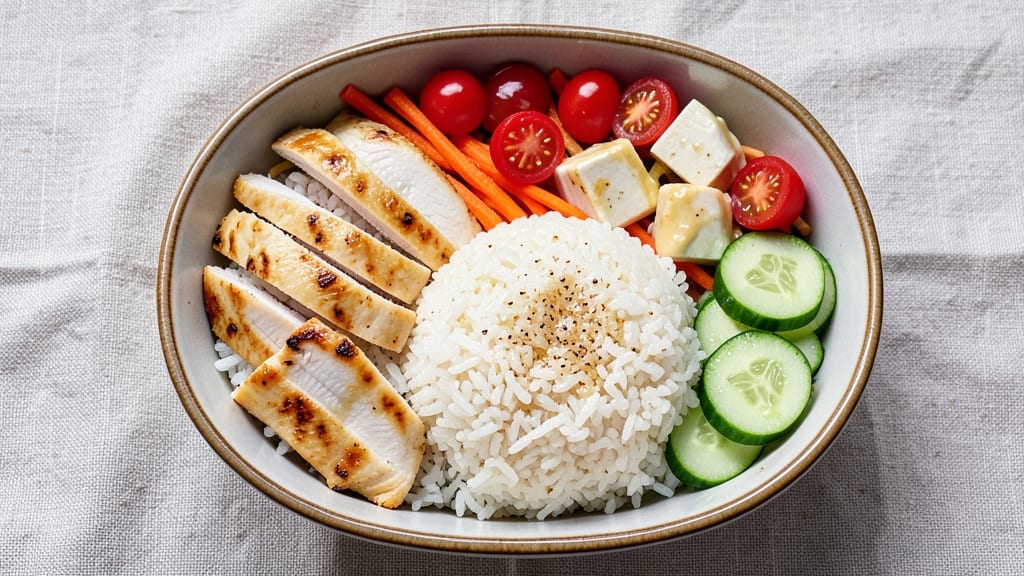
This bento salad recipe transforms lunch into a visually stunning, portable masterpiece that balances flavors and textures in every bite. ✨ The secret lies in strategic layering—crispy protein, fluffy grains, fresh vegetables, and crunchy celery crowns that elevate every component.
Perfect for meal prep, this dish delivers restaurant-quality presentation without the fuss, making it ideal for busy professionals or anyone craving a satisfying midday meal.
The beauty of this recipe is its adaptability—swap proteins like grilled chicken, tofu, or salmon based on preference, and customize grains with rice, quinoa, or farro. Fresh vegetables add vibrant colors and textures, while optional toppings like pickled ginger or sesame seeds introduce bold flavors that keep each bite exciting.
The assembly process is straightforward, ensuring you can pack this salad in minutes and enjoy it all week.
What sets this bento salad apart is its portable design, where every ingredient is portioned thoughtfully to create a visually appealing, bite-sized meal. The celery crowns add a decorative touch while providing a satisfying crunch, balancing the softer elements of the salad.
Whether you're prepping for work or a picnic, this recipe guarantees a lunch that’s as delicious as it is impressive.
Ready in under 30 minutes, this salad is perfect for meal prep enthusiasts who value both convenience and nutrition. The combination of protein, grains, and vegetables ensures a well-rounded meal that keeps you energized throughout the day. Let’s build this portable lunchbox masterpiece!
Ingredients for bento salad
Pantry staples meet fresh produce for this visually stunning, portable lunchbox masterpiece.
| Ingredient | Amount | Notes |
|---|---|---|
| Cooked Sushi Rice 🍚 | 2 cups | Unseasoned, cooled completely |
| Grilled Chicken Breast 🍗 | 1 ½ lb | Boneless, skinless, diced small |
| Extra-Firm Tofu 🥬 | 1 block | Pressed, cubed, pan-fried |
| Cherry Tomatoes 🍅 | 1 cup | Halved, vine-ripened preferred |
| Carrots 🥕 | 1 cup | Julienned, baby carrots work |
| Cucumber 🥒 | 1 whole | English or Persian, thinly sliced |
| Celery Stalks 🧅 | 3 whole | Thinly sliced, for crowns |
| Sesame Seeds 🌾 | 1 tbsp | White or black, toasted |
| Pickled Ginger 🍋 | 2 tbsp | Thinly sliced, for garnish |
| Avocado Oil Mayonnaise 🫒 | ¼ cup | For binding, vegan optional |
| Rice Vinegar 💧 | 2 tbsp | Seasoned preferred |
| Sesame Oil 🫒 | 1 tbsp | For finishing touch |
| Diamond Crystal Kosher Salt 🧂 | ½ tsp | For seasoning |
| Freshly Ground Black Pepper 🌶️ | ¼ tsp | For finishing |
The rice is the foundation—sushi rice works best for its sticky texture, but jasmine or basmati will do in a pinch. For the protein, Trader Joe's pre-cooked grilled chicken saves time, or you can roast your own. Tofu should be extra-firm and pressed for at least 30 minutes to avoid sogginess. I always grab the organic cherry tomatoes at Whole Foods—they're sweeter and hold up better in salads. Celery crowns are the star here, so look for bright green, crisp stalks with no brown spots.
No grilled chicken? Pan-seared salmon or marinated tempeh works beautifully. Swap regular rice for quinoa or farro if you prefer. For the cucumber, English cucumbers are less seedy than regular ones, but any variety works if you remove the seeds. Pickled ginger can be subbed with thinly sliced jalapeños for heat. The avocado oil mayo is non-negotiable for binding—store-bought works, but homemade with avocado oil and a pinch of salt is even better. If you're avoiding vegan options, regular mayo with a splash of lemon juice does the trick.
Prep ahead to save time: cook the rice and protein in advance, store separately in airtight containers. The celery crowns should be assembled fresh—keep them wrapped in damp paper towels in the fridge for up to 3 days. This salad keeps beautifully for 4 days in the fridge, but the avocado and cucumber will soften after day 2. For meal prep, portion into bento boxes with compartmentalized sections—the celery crowns go on top last to maintain their crispness.
Why You'll Love This Recipe
- I swear by this trick: just toss the grilled chicken and pressed tofu into the rice while it’s still warm, then fold in those juicy cherry tomatoes and shredded carrots. The rice soaks up all the flavor without a single extra pan—my lazy Sundays just got a glow-up.
- Here’s what sold me: I can use leftover rice and stretch a single chicken breast into three lunches. The tofu’s cheap, the veggies last forever, and I’m not sacrificing taste. My wallet and my taste buds win—no guilt, just good food.
Step-by-step instructions for bento salad layers
Here's how to assemble these portable lunchbox layers with perfect texture contrast.
👨🍳 Step 1: Prepare the Crunchy Celery Crowns
Start with the celery stalks—this is where the texture magic begins. Thinly slice each stalk lengthwise into ¼-inch thick ribbons using a sharp mandoline or chef's knife. Arrange the slices in overlapping concentric circles on a parchment-lined baking sheet, creating perfect crown shapes. You want about 12-15 crowns total for your 4 servings.
Lightly brush each crown with 1 teaspoon sesame oil (reserve the rest for later) and sprinkle with ¼ teaspoon toasted sesame seeds. Bake at 375°F for 8-10 minutes until edges are golden brown and crisp. Watch closely—they'll burn quickly once they start browning. Let cool completely before assembling.
🥘 Step 2: Build the Protein Layer
In a medium bowl, gently combine the 1.5 lb diced grilled chicken breast and 1 block cubed pan-fried tofu (about 1½ cups total). Drizzle with 1 tablespoon rice vinegar and ½ tablespoon sesame oil, then toss lightly to coat. Season with ¼ teaspoon diamond crystal kosher salt and ⅛ teaspoon freshly ground black pepper—just enough to enhance their natural flavors without overpowering.
I always use a silicone spatula here to avoid breaking up the chicken pieces. The goal is to distribute the dressing evenly while maintaining distinct protein shapes. Set aside while you prepare the vegetables—this layer will stay fresh for up to 2 hours in the fridge.
🍳 Step 3: Create the Vibrant Vegetable Medley
In a large mixing bowl, combine the 2 cups cooked sushi rice with 1 cup halved cherry tomatoes, 1 cup julienned carrots, and 1 whole cucumber sliced into ¼-inch rounds. Gently fold in ¼ cup avocado oil mayonnaise using a rubber spatula until everything is evenly coated but still distinct. The rice should be completely saturated but not mushy.
Here's the thing—don't overmix. You want visible texture in each bite. Taste and adjust seasoning with remaining ¼ teaspoon diamond crystal kosher salt and ⅛ teaspoon freshly ground black pepper if needed. The acidity from the tomatoes should balance the richness of the mayo.
🥘 Step 4: Assemble the Bento Layers
Divide the protein mixture evenly among 4 small bento containers or glass jars. Create a base layer by pressing down gently to form an even surface. Then carefully spoon the vegetable-rice mixture on top, creating a ½-inch thick layer that covers the protein completely. Use the back of a spoon to smooth the top.
For the final touch, place 3-4 celery crowns on top of each assembly. This isn't just decoration—it creates that satisfying crunch when you take your first bite. Add ½ tablespoon pickled ginger slices and ½ teaspoon toasted sesame seeds to each container for color contrast and a bright, tangy finish.
⏰ Step 5: Chill and Pack for Portability
Cover the assembled bento boxes and refrigerate for at least 1 hour before serving. This chilling time allows all the flavors to meld together while keeping the celery crowns perfectly crisp. When ready to pack, store in an insulated lunch bag with an ice pack to maintain freshness for up to 6 hours.
The beauty of this salad is in the layers—each bite delivers a progression of textures from crisp celery to creamy rice to tender protein. To serve, simply open the container and enjoy straight from the box, or transfer to a plate for a more formal presentation. The flavors will continue developing as it sits, so I recommend eating within 2 hours of assembly for peak freshness.
Pro Tips For Making Bento Salad
- Grill Chicken Fast: Use a cast-iron skillet on high heat—3-4 minutes per side for medium doneness. I learned the hard way that thin-cut chicken cooks faster than you think, and overcooking turns it dry. Flip once, then let it rest under foil while you prep the rest.
- Press Tofu Dry: Wrap extra-firm tofu in a towel, place it on a plate, and weigh it down with a heavy pan for 10 minutes before slicing. This removes excess moisture so it absorbs flavors better and doesn’t get soggy in the salad. (Yes, even if you’re impatient like me.)
- Halve Cherry Tomatoes: Cut them in half and remove the seeds—it makes them easier to eat from the bento box and prevents a messy, juicy pile. I used to skip this, but the difference in texture and presentation is noticeable.
- Chill Rice First: Spread cooked sushi rice on a tray and refrigerate for 20 minutes before assembling the salad. Cold rice holds up better in the box, stays fluffier, and won’t turn into a gluey mess by lunchtime. (Your future self will thank you.)
Make-ahead tips for this dish
Prep Ahead Timeline
Start by cooking the 2 cups sushi rice and 1.5 lb grilled chicken (or tofu) the night before. Store them separately in airtight containers—the rice will stay fluffy for 3 days if kept at room temperature after cooling completely.
The protein holds up even better, maintaining moisture for 4 days in the fridge. This foresight saves 30-45 minutes on prep day. 📅
Celery Crown Prep
Celery crowns are best made fresh, but you can slice the celery stalks ahead and store them in a sealed container with a damp paper towel. They'll stay crisp for 3 days in the fridge.
On prep day, simply arrange them on the baking sheet and bake for 8-10 minutes—no need for extra prep time. I always do this right before assembling to maintain that perfect crunch. ✨
Portioning Strategy
Divide all components into 4 equal portions using compartmentalized bento boxes or glass jars. The protein goes in the bottom section, followed by the rice-vegetable mix, and finally the celery crowns on top.
This keeps everything fresh and prevents sogginess. I use 16-ounce mason jars with wide mouths for easy packing and serving. 🥫
Storage Containers
For maximum freshness, use containers with tight-sealing lids like OXO Good Grips Pop Containers or EcoLunchbox Silicone Lids. These keep the celery crowns crisp for 2 days when stored properly.
Avoid plastic containers—they can cause condensation and make the rice soggy faster. Glass is my go-to for both aesthetics and food safety. ❄️
Freezing Options
While this salad isn't ideal for freezing (the celery crowns lose their crunch), you can freeze the protein and rice-vegetable mix separately for 2 months. Thaw overnight in the fridge, then assemble fresh.
The texture won't be perfect, but it's a great backup for when you're truly pressed for time. Just add fresh celery crowns before eating. ⏰
Meal Prep Schedule
Here's my foolproof schedule: Sunday night—cook rice and protein; Monday morning—assemble the salad; Wednesday—replenish celery crowns if needed. This ensures you always have a fresh bento salad ready for 4 days without any last-minute stress. The key is consistency in portioning and storage. 💪
Nutrition facts
Frequently asked questions
Can I make this bento salad without rice?
Swap the rice for quinoa, farro, or even cauliflower rice for a lower-carb option. The key is maintaining the salad's balanced texture—just ensure your substitute holds its shape when mixed with the mayo. Quinoa works best as it's naturally protein-rich and stays fluffy like rice.
How do I keep the celery crowns crispy for longer?
Store them in an airtight container lined with a damp paper towel to maintain moisture without sogginess. For maximum crispness, bake them fresh the day you assemble the salad. If prepping ahead, slice the celery and store it separately—arrange the crowns just before eating to preserve that satisfying crunch.
What's the best way to reheat this salad?
This salad isn't meant to be reheated—it's designed to be enjoyed cold or at room temperature. If you must warm it slightly, microwave the rice-vegetable mix for 20-30 seconds (cover with a damp paper towel), then add fresh celery crowns on top. The protein layer should remain cold for optimal texture and flavor.
Can I use store-bought pre-cooked rice?
Yes! Use day-old sushi rice from the fridge for best texture—it's less sticky and mixes better with the mayo. Avoid microwaveable rice packets as they often contain preservatives that can alter the flavor. If using pre-cooked rice, let it cool completely before mixing to prevent the salad from becoming soggy.
What other proteins work well in this recipe?
Try grilled shrimp, smoked salmon, or marinated tempeh for plant-based options. For extra flavor, poach the shrimp in rice vinegar and soy sauce before adding. The protein should be fully cooked and cooled before assembling to maintain the salad's freshness and texture.