
Salads
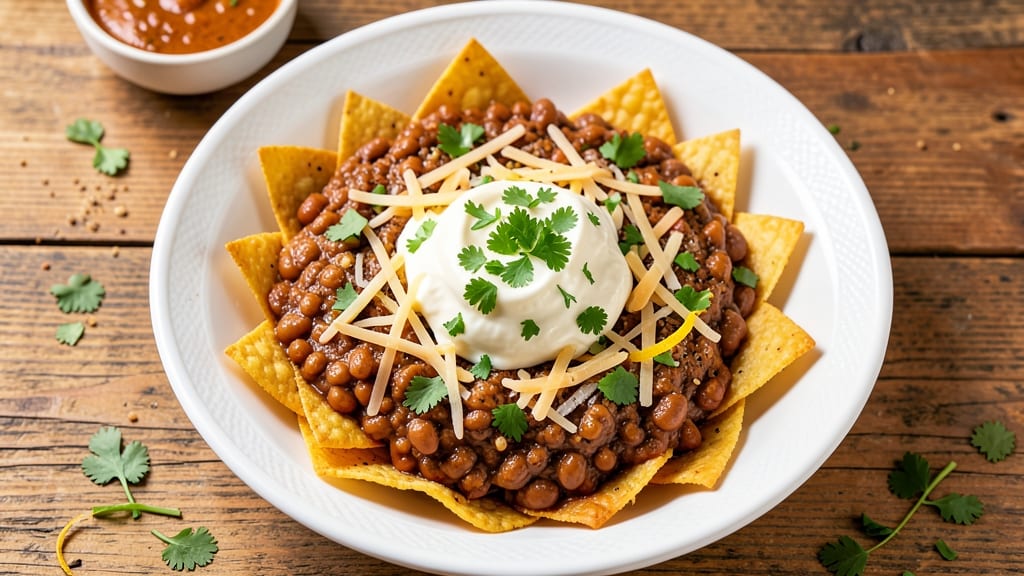
This Bandera Salad recipe delivers the perfect balance of crispy, crunchy texture and rich, creamy dressing that makes every bite irresistible. The secret lies in perfectly fried tortilla strips layered over refried beans, melted cheese, and tangy dressing—a Tex-Mex classic that’s both hearty and satisfying.
I’ve refined this recipe over years to ensure the tortilla strips stay crispy while the dressing remains velvety smooth, never soggy.
The foundation of a great Bandera Salad starts with crispy tortilla strips—the star of the dish. You’ll need flour tortillas cut into strips, fried until golden and crisp, then layered over a bed of refried beans.
The creamy dressing, a mix of mayonnaise, sour cream, and lime juice, ties everything together with its tangy, slightly spicy flavor. Top it with shredded cheese, jalapeños, and optional garnishes like avocado or sour cream for extra richness.
What sets this recipe apart is the foolproof technique for keeping the tortilla strips crispy while the salad stays fresh. The dressing is poured over the warm beans and cheese, allowing it to melt into a cohesive, creamy layer.
The result? A salad that’s hearty enough for a main dish but light enough for a side—perfect for game day, potlucks, or a quick weeknight dinner.
For added flair, consider modern twists like swapping refried beans for black beans or adding smoked paprika to the dressing. Whether you stick to tradition or experiment with variations, this Bandera Salad is guaranteed to become a crowd-pleaser. Let’s get started!
Ingredients for bandera salad
Crispy tortilla strips, creamy dressing, and tangy jalapeños—this Tex-Mex classic delivers hearty satisfaction.
| Ingredient | Amount | Notes |
|---|---|---|
| Flour Tortillas 🌯 | 8 whole | Medium size, 10-inch preferred |
| Vegetable Oil 🫒 | 3 cups | For deep frying tortilla strips |
| Refried Beans 🌽 | 2 cups | Canned or homemade, warmed |
| Shredded Monterey Jack Cheese 🧀 | 2 cups | Medium shred preferred |
| Mayonnaise 🥛 | ½ cup | Full-fat for creaminess |
| Sour Cream 🥛 | ½ cup | Full-fat preferred |
| Lime Juice 🍋 | ¼ cup | Freshly squeezed |
| Jalapeño Peppers 🌶️ | 2 whole | Sliced thin, seeds removed |
| Salt 🧂 | 1 tsp | Kosher or sea salt |
| Ground Black Pepper 🌶️ | ½ tsp | Freshly ground preferred |
| Smoked Paprika 🌶️ | ½ tsp | For dressing depth |
| Garlic Powder 🧄 | ½ tsp | For dressing flavor |
| Avocado (optional) 🥑 | 1 whole | Sliced for garnish |
| Sour Cream (optional) 🥛 | ¼ cup | For garnish |
The tortillas are the star, so medium-sized flour tortillas work best—they fry up crispy without being too thick. Mission or La Tortilla Factory brands are my go-to, but any decent-quality flour tortillas will do. Avoid whole wheat—they burn too fast. For frying, vegetable oil is key—it stays stable at high heat and doesn't overpower the flavor. Keep a thermometer handy; aim for 350°F. The oil should be hot enough to fry the strips in about 1-2 minutes per batch. If you're short on time, baking them at 400°F for 8-10 minutes works too, though they won't be quite as crispy.
Refried beans can be store-bought or homemade—just make sure they're warmed through before assembling. For the dressing, full-fat mayo and sour cream are non-negotiable (low-fat versions won't give that velvety texture). Fresh lime juice is a must—bottled just won't cut it. No jalapeños? Substitute with pickled red onions or a dash of hot sauce. Want extra smokiness? Add ½ teaspoon of chipotle powder to the dressing. And if you're feeling fancy, swap the Monterey Jack for pepper jack—the heat balances beautifully with the creamy elements.
Assemble the salad just before serving—this keeps the tortilla strips crispy. Store any leftovers in an airtight container with a paper towel on top to absorb moisture. Reheat the beans and cheese separately if needed, then reassemble with the dressing and tortilla strips. The salad keeps well for 2 days in the fridge, but the tortilla strips will lose crispness over time. For a make-ahead option, fry the strips ahead and store them in the freezer—reheat at 375°F for 5 minutes to restore crispness. Garnishes like avocado and extra sour cream should always be added fresh.
Why You'll Love This Recipe
- No-Fuss Assembly: I swear by this recipe on days when I’d rather not slave over chopping—just fry those tortillas in oil until they’re golden, layer them with refried beans and cheese, and fold. The mayo ties it all together without extra fuss.
- Cheesy, Creamy Magic: That Monterey Jack melts into the tortillas like a dream, while the mayo adds a rich, tangy punch. Honestly, the first time I tried it, I ate half the pan straight from the skillet.
- Lunchbox Legend: Between us, this is my go-to for school lunches or work dinners. Pack it in a container, and it stays intact for hours—no soggy messes. My kid’s favorite? The crispy edges that hold up perfectly.
- Budget Win: A single can of beans, a bag of cheese, and a pack of tortillas stretch to feed four for way less than takeout. Plus, leftovers reheat like a champ—just a quick zap in the microwave, and it’s back to that crispy-cheesy glory.
Step-by-step instructions for Bandera salad
Here's how to create perfectly crispy tortilla strips and a tangy, creamy dressing that balances heat and richness.
Prepare the Crispy Tortilla Strips
Cut each of the 8 whole flour tortillas into 8 equal strips, about 2 inches wide. You should have approximately 64 strips total. Heat the 3 cups vegetable oil in a deep fryer or large pot to 350°F. Use a deep-fat thermometer to monitor the temperature carefully—it should remain steady at this heat.
Fry the tortilla strips in batches, no more than 10-12 strips at a time, for 1-2 minutes until they turn a golden brown color. Remove with a slotted spoon and drain on paper towels. The strips should be crispy but not greasy—this is the foundation of your salad. Keep the oil at 350°F between batches by adding more oil if needed.
Make the Creamy Dressing
In a medium bowl, combine the 0.5 cup mayonnaise, 0.5 cup sour cream, 0.25 cup lime juice, 0.5 tsp smoked paprika, 0.5 tsp garlic powder, 1 tsp salt, and 0.5 tsp ground black pepper. Whisk until smooth and well blended. Taste and adjust seasoning if needed—this dressing should be tangy, slightly spicy, and perfectly balanced.
For extra heat, add finely minced 2 whole jalapeño peppers (seeds removed) to the dressing. Let the mixture sit for 10 minutes to allow the flavors to meld. This resting time ensures the dressing reaches its ideal consistency and temperature before combining with the other components.
Assemble the Salad
In a large bowl, layer half of the crispy tortilla strips, all 2 cups refried beans, and 1 cup of the shredded Monterey Jack cheese. Repeat with the remaining strips, beans, and cheese. Pour the dressing evenly over the top and gently toss until everything is well coated. The tortilla strips should maintain their crispiness while absorbing the creamy dressing.
For an optional garnish, top with sliced 1 whole avocado and an additional 0.25 cup sour cream (optional). Serve immediately while the tortilla strips are still crispy. This salad delivers a perfect balance of textures—crunchy, creamy, and slightly spicy—with every bite.
Serve with Confidence
Divide the salad into 6 equal portions, ensuring each serving has an even distribution of crispy tortilla strips, creamy dressing, and refried beans. The key to serving this dish well is maintaining the crispiness of the tortilla strips—serve immediately after assembly to prevent them from softening.
Pair with a cold beer or a refreshing limeade to complement the tangy, creamy flavors. The combination of smoky paprika, zesty lime, and rich sour cream creates a dressing that elevates the simple yet satisfying Bandera salad to restaurant-quality.
Pro Tips For Making Bandera Salad
- Crisp the Tortillas Right: Heat a dry skillet over medium-high until it’s smoking hot—then lay the tortillas in one at a time, no oil needed. Flip once when they puff and start to brown, about 30 seconds. I used to worry about burning them, but the edges will crisp faster than you think.
- Warm the Beans First: Spread refried beans on the tortillas warm, straight from the can or warmed in a small pot with a splash of water. Cold beans make the salad soggy, and no one wants a sad, limp layer. Two minutes in the microwave does the trick—just don’t let them dry out.
- Skip the Overlapping Layers: Stack cheese and beans neatly, not haphazardly. If you pile everything in the center, the edges stay bare and the salad looks messy. Spread the mayo-thinned beans thin, then sprinkle cheese evenly—it’ll melt into a cohesive blanket, not a clump.
- Upgrade with Sour Cream: Mix a tablespoon of sour cream into the mayo before spreading it on the beans. It cuts the richness and adds a tang that balances the cheese. I was skeptical until I tried it—now it’s non-negotiable for me. (Yes, even if it’s one extra step.)
Regional styles of this bandera salad
Texas-Style Origins
The Bandera Salad traces its roots to South Texas, where it became a staple at game day gatherings and fiestas. Legend has it that the dish was born in the 1970s at The Bandera Grill in San Antonio, created as a hearty alternative to traditional salads.
The original version used corn tortillas instead of flour, but modern adaptations—like the one here—often swap them for flour tortilla strips that fry up extra crispy. 🌶️
In Texas, this salad is often served in a large cast-iron skillet or ceramic bowl, allowing guests to dig in family-style. The dish’s name pays homage to the Bandera County region, known for its rich Mexican-American heritage.
Traditional versions sometimes include ground beef or chorizo, but the vegetarian adaptation here keeps it just as satisfying.
Mexican Fiesta Twist
For a more authentic Mexican touch, swap the refried beans for charro beans (a smoky, slightly sweet variety) and top with crumbled queso fresco instead of Monterey Jack.
In Mexico City, you’ll find versions with avocado slices, radishes, and a cilantro-lime dressing—a lighter take on the creamy Texas style. The key difference? Mexican Bandera Salads often use corn tortillas for a nuttier flavor. 🌽
Add diced mango for a sweet contrast or pickled red onions for tang. In Oaxaca, the dish might include epazote (a fragrant herb) in the beans, giving it an earthy depth.
For heat lovers, habanero peppers replace jalapeños in some regions. The Mexican approach leans into fresher, brighter flavors while keeping the same crispy-tangy balance.
California Fusion
West Coast chefs put their own spin on Bandera Salad by incorporating California avocados and citrus-infused dressings. In Los Angeles, you’ll find versions with smoked trout or grilled shrimp mixed into the beans, turning it into a protein-packed main dish.
The dressing often includes orange zest and avocado oil for a lighter, brighter profile. 🥑
Another California twist? Baked tortilla chips replace fried strips, making it a healthier yet still crispy option. Some restaurants in San Diego serve it with mango-habanero salsa on top, adding a tropical heat that pairs perfectly with the creamy base.
The West Coast version is all about bold flavors and fresh ingredients—think heirloom tomatoes or microgreens as garnishes.
Southwest BBQ Pairings
In Arizona and New Mexico, Bandera Salad is often served alongside smoked brisket or pulled pork, creating a Tex-Mex BBQ fusion. The smoky, spicy notes of the meat complement the salad’s tangy dressing beautifully. For a full meal, add cornbread or tortilla chips on the side. 🔥
In Albuquerque, the dish might include green chile in the dressing, adding a roasted, earthy heat. Some versions even use blue corn tortillas for a deeper flavor. Pair it with a Mexican lager like Modelo or a spicy margarita to enhance the Southwestern vibe.
The contrast between the smoky BBQ and the fresh, crisp salad makes it a perfect game-day combo.
Nutrition facts
Frequently asked questions
Can I make Bandera Salad without frying the tortilla strips?
Yes! For a healthier version, bake the tortilla strips at 400°F for 8-10 minutes until crispy. Use an oven-safe baking sheet and flip halfway through. They won't be as crispy as fried strips, but they'll still hold up well in the salad. For extra crunch, sprinkle with a pinch of salt before baking.
What’s the best way to keep the tortilla strips crispy?
Assemble the salad right before serving and keep the tortilla strips separate until the last minute. If you must prep ahead, store the fried strips in an airtight container with a paper towel to absorb moisture. Reheat at 375°F for 5 minutes to restore crispness. Never microwave—they’ll turn soggy instantly!
Can I make this salad vegetarian?
This recipe is already vegetarian, but you can boost protein by adding black beans or crumbled tofu to the refried beans. For a meaty texture, try spiced lentils or seitan strips. The creamy dressing and crispy tortillas keep it satisfying without any animal products.
How spicy should the jalapeños be?
Remove seeds and membranes for mild heat, or leave them in for intense spice. For a balanced flavor, use 1 jalapeño with seeds removed—this adds just enough kick without overwhelming the creamy dressing. If you love heat, add a dash of hot sauce or finely chopped serrano peppers to the dressing.
What’s the best way to store leftovers?
Store the salad in an airtight container with a paper towel on top to absorb moisture. Keep the tortilla strips, beans, and cheese separate until reheating. Warm the beans and cheese in a skillet, then reassemble with the dressing and strips. Leftovers stay fresh for 2 days**—but the tortilla strips will lose crispness, so it’s best enjoyed fresh!