
Salads
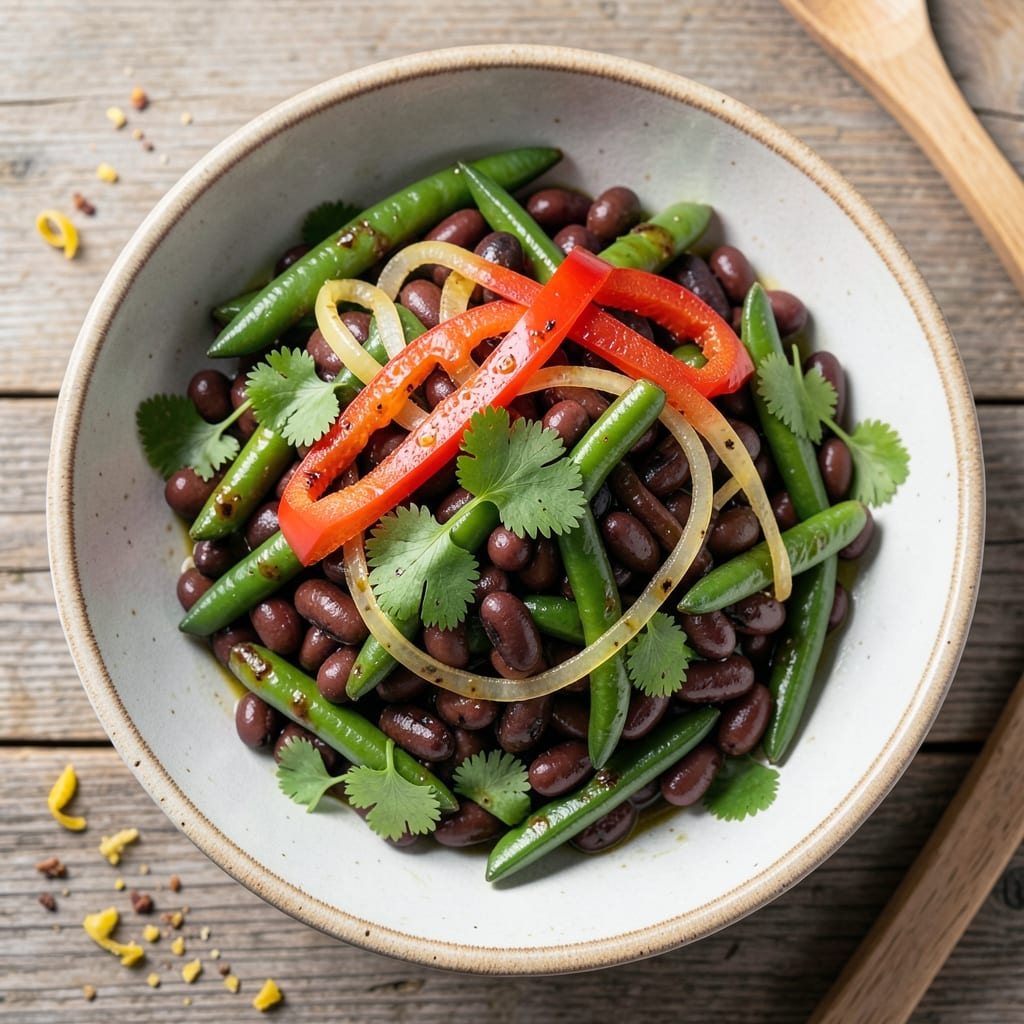
This 3 bean salad recipe with black beans transforms pantry staples into a protein-packed powerhouse that keeps for days and tastes even better the next. After years of testing bean salad variations, I've perfected a balance of textures and flavors that holds up through meal prep and delivers restaurant-quality results at home.
The secret lies in three simple ingredients—black beans, kidney beans, and green beans—tossed with a bright vinaigrette that penetrates every bean while preserving their individual textures. I discovered this combination by accident when I needed a make-ahead side dish that wouldn't turn mushy in the fridge, and it quickly became my go-to protein source for lunches and potlucks.
What you'll end up with is a salad that's bold in flavor, satisfying in protein, and effortless to prepare. The beans stay tender-crisp, the dressing clings without overwhelming, and the acidity from vinegar and lemon keeps the salad fresh-tasting even after storage. This isn't just another bean salad—it's a meal component that works as a side, light lunch, or even a vegetarian main dish.
Perfect for meal preppers, vegetarians, or anyone who wants a no-fuss, protein-rich dish that comes together in minutes. The recipe scales beautifully for parties or individual servings, and the flavors only deepen as it sits. Let's make this salad!
Ingredients for 3 bean salad recipe with black beans
Pantry staples meet bold flavors in this protein-packed bean salad that gets better with time.
| Ingredient | Amount | Notes |
|---|---|---|
| Canned Black Beans 🌱 | 1 ½ cups | Drained and rinsed thoroughly |
| Canned Kidney Beans 🌱 | 1 cup | Drained and rinsed thoroughly |
| Canned Green Beans 🌿 | 1 cup | Cut into bite-sized pieces |
| Yellow Onion 🧅 | 1 whole | Diced into small pieces |
| Red Bell Pepper 🍆 | 1 whole | Diced into small pieces |
| Fresh Cilantro 🌿 | ¼ cup | Chopped finely for garnish |
| Extra-Virgin Olive Oil 🫒 | ⅓ cup | High-quality for best flavor |
| Apple Cider Vinegar 🍏 | ¼ cup | For tangy brightness |
| Maple Syrup 🍁 | 2 tbsp | Or agave nectar for sweetness |
| Garlic Cloves 🧄 | 3 cloves | Minced finely for depth |
| Lemon Juice 🍋 | 2 tbsp | Freshly squeezed for acidity |
| Salt 🧂 | 1 tsp | Kosher or sea salt preferred |
| Ground Black Pepper 🌶️ | ½ tsp | Freshly ground for heat |
| Smoked Paprika 🌶️ | ½ tsp | For subtle smokiness |
The beans are the heart of this salad, so look for high-quality canned varieties—none of that mushy, waterlogged stuff. Trader Joe's and Whole Foods carry excellent brands like Eden Organic or Wild Garden. If you're using dried beans, soak them overnight and cook until tender but still firm. The green beans should be cut into bite-sized pieces so they don't overpower the mix. For the onion and bell pepper, dice them uniformly—this ensures even distribution in every bite. Fresh cilantro is ideal, but if you're using dried, start with half the amount and adjust to taste.
No apple cider vinegar? White wine vinegar or lemon juice works just as well—both add that bright tang. Short on maple syrup? Agave nectar or date syrup are perfect swaps. The garlic can be roasted for a sweeter flavor if you prefer, but raw minced garlic gives the most punch. For extra protein, add chickpeas or white beans—just reduce the other beans slightly to keep the texture balanced. The smoked paprika is optional but adds a nice depth that complements the beans beautifully. If you're sensitive to heat, you can omit it entirely without affecting the overall flavor.
This salad keeps for 5-6 days in the fridge, with flavors actually improving as it sits. Store it in an airtight container with a splash of lemon juice to keep the beans vibrant. For meal prep, portion into individual containers—it's perfect for lunches or potlucks. If you want to add crunch later, keep the cilantro and any toppings separate until serving. Freezing isn't recommended as it can make the beans mushy, but the dressing components (vinegar, oil, syrup) can be pre-mixed and stored separately for up to 3 months.
Why You'll Love This Recipe
- No-Chop Shortcuts: I swear by the canned beans here—no soaking, no waiting. Just drain, rinse, and toss with the crisp onion and bell pepper (which I dice while watching one episode of my favorite show). The green beans add that satisfying crunch without the fuss of blanching.
- Sweet-Savory Balance: That charred red bell pepper? Everything. It brings this salad to life with a smoky depth, while the kidney beans add a meaty texture. Honestly, I’ll eat it straight from the jar sometimes—no joke.
- Lunchbox Legend: Between us, this is my go-to for packed lunches. The flavors stay vibrant for days, and I can swap in whatever veggies I have (extra corn? Sure. Avocado? Even better). My kids call it "the grown-up snack," which counts as a win.
- Pantry Powerhouse: I made this last week for $3.50 total—canned beans are my budget hero. Plus, it’s the ultimate "make once, eat twice" dish: toss it with rice for dinner, then slather it on toast the next day. No waste, all flavor.
Step-by-step instructions for 3 bean salad with black beans
Here's how to create a vibrant, protein-rich salad that keeps well for days.
Prepare the Bean Base
Start by draining and rinsing all the beans thoroughly under cold water. I like to use my hands to give them a quick massage in the colander—this removes any residual canning liquid and helps prevent a mushy texture. Transfer the drained black beans, kidney beans, and green beans to a large mixing bowl.
Give them a gentle stir to distribute them evenly. The black beans will provide hearty texture, the kidney beans add earthy depth, and the green beans contribute a pleasant crunch. This combination creates a satisfying mix of textures that keeps the salad interesting with every bite.
Sauté the Vegetable Foundation
In a medium skillet over medium heat, add the diced yellow onion and red bell pepper. Cook for about 5 minutes until the onions become translucent and the peppers begin to soften. I like to stir occasionally to ensure even cooking and prevent sticking.
During the last minute of cooking, add the minced garlic cloves and continue cooking until you can smell their aromatic essence filling your kitchen. This step builds the flavor foundation for your salad. The onions should be tender but not browned, and the peppers should retain some of their vibrant color and slight crunch.
Create the Flavorful Dressing
In a small bowl, whisk together the extra-virgin olive oil, apple cider vinegar, maple syrup, lemon juice, salt, ground black pepper, and smoked paprika. I find using a fork works perfectly for this—just whisk vigorously for about 30 seconds until everything is well combined and the mixture looks emulsified.
The dressing should have a smooth, slightly glossy appearance. The apple cider vinegar provides tangy brightness, while the maple syrup adds a subtle sweetness that balances the acidity. The smoked paprika contributes a warm, earthy note that complements the beans beautifully. Taste a small spoonful—you want it to be well-seasoned but not overwhelmingly salty or sweet.
Combine Everything
Pour the warm vegetable mixture into the bowl with the beans. Add the dressing and toss everything together gently but thoroughly. I like to use a large spoon or my hands to distribute the dressing evenly. The beans should be well-coated but not soggy—if it looks too dry, add a tablespoon or two of water and toss again.
Let the salad sit at room temperature for about 10 minutes before serving. This brief resting period allows the flavors to meld together beautifully. The beans will absorb some of the dressing, creating a more cohesive texture and flavor profile. The salad should be vibrant in color with a perfect balance of sweet, tangy, smoky, and savory notes.
Garnish and Serve
Just before serving, sprinkle the chopped fresh cilantro over the top. Give the salad one final gentle toss to distribute the cilantro evenly. The bright green color of the cilantro will make your salad look even more inviting, and its fresh, citrusy flavor will provide a lovely contrast to the earthy beans and warm dressing.
Serve immediately while the flavors are at their peak. This salad tastes best when served at room temperature, making it perfect for picnics, potlucks, or as a refreshing side dish. The combination of textures and flavors makes every bite satisfying, while the protein content makes it a filling option that holds its own as a main dish.
Pro Tips For Making 3 Bean Salad Recipe With Black Beans
- DRAIN AND RINSE BEANS: Drain the canned beans but give them a quick cold-water rinse—especially the kidney beans. The rinse cuts the metallic tang that can sneak into the salad, and it stops the beans from turning mushy later. (I learned this the hard way after a batch tasted weirdly tinny.)
- CHOP ONION AND PEPPER SMALL: Cut the yellow onion and red bell pepper into ¼-inch dice, not big chunks. Smaller pieces distribute flavor evenly and let the salad hold together better when tossed. (Yes, it takes a few extra minutes, but your salad won’t look like a veggie stew.)
- DON’T SKIP THE ROOM-TEMP BEANS: Let the drained beans sit at room temperature for 10 minutes before mixing. Cold beans make the salad watery and dull the flavors—waiting ensures everything comes together with a consistent texture. (Your future self will notice the difference.)
- USE GREEN BEANS RAW: Skip cooking the canned green beans—just drain, rinse, and chop them. Overcooking turns them into mush, and they’ll just sit like soggy logs in the salad. Raw green beans add crunch and freshness without stealing the spotlight. (I was skeptical until I tried it.)
Essential equipment for this dish
Basic Mixing Bowl
You don't need anything fancy here—I use a large glass mixing bowl (like the Pyrex 8-cup kind) because it's sturdy and easy to clean. The glass keeps everything cool while you mix, and the size accommodates all the ingredients without overflowing. If you're prepping for a crowd, a stainless steel hotel pan works great too—just make sure it's wide enough for easy tossing. 🥣
Cutting Board & Knife
A sharp chef's knife (I love my Victorinox 8-inch) and a cutting board (I prefer bamboo for gentle prep) are essential for dicing the onion and bell pepper. The key is to cut them uniformly—about ¼-inch dice—so they distribute evenly. For the garlic, a garlic press saves time, but mincing with a knife gives you more control over the texture. Pro tip: Keep your knife sharp to avoid crushing the vegetables.
Skillet for Sautéing
Any medium-sized skillet (8-10 inches) with a lid works for sautéing the onions and peppers. I use a stainless steel one because it heats evenly and doesn't warp, but a non-stick pan is fine if you're worried about sticking. Avoid aluminum—it can react with acidic ingredients like vinegar. A splatter screen is helpful if you're adding garlic, but it's not mandatory. 🔥
Whisk or Fork
For the dressing, a small whisk (like the OXO Good Grips) is ideal, but a fork works perfectly if you don't have one. Whisking for 30 seconds ensures the dressing emulsifies smoothly. If you're making a double batch, a hand mixer on low speed can save time, but whisking by hand gives you better control over the texture. I always taste the dressing before mixing it in—this is where you can adjust sweetness or acidity.
Measuring Tools
Precision matters with this recipe, so grab your dry measuring cups for the beans and liquid measuring cup for the vinegar and oil. A teaspoon and tablespoon set is a must for the spices and syrup. I keep a small kitchen scale handy for spices like smoked paprika—I measure by weight (about 2.5 grams per ½ tsp) to ensure consistency. If you don't have one, use the spoon measurements provided, but level them off with a knife for accuracy. ✨
Storage Containers
For meal prep, airtight glass containers (like Mason jars or Rubbermaid Select) are my go-to. They keep the salad fresh for 5-6 days in the fridge. If you're storing it for longer, divide it into smaller portions to prevent sogginess. For the dressing components (vinegar, oil, syrup), I store them separately in small jars with tight lids—they'll last up to 3 months in the fridge. Label everything with dates to keep track!
Nutrition facts
Frequently asked questions
Can I use dried beans instead of canned?
Yes, but you'll need to soak them overnight first. Use 1 cup dried black beans, ½ cup dried kidney beans, and ½ cup dried green beans (soaked separately). Cook until tender but still firm—about 45-60 minutes for black/kidney beans and 15 minutes for green beans. Drain well before mixing!
How do I make this salad spicier?
Add ½ teaspoon cayenne pepper or 1 teaspoon hot sauce to the dressing. For smoky heat, increase smoked paprika to 1 teaspoon. If you love fresh spice, toss in ½ teaspoon chopped jalapeño with the cilantro garnish. Always taste first!
Can I make this ahead of time?
This salad actually tastes better after 24 hours! Store in an airtight container with a splash of lemon juice on top. The flavors meld beautifully, and the beans stay tender. For best texture, keep dressing separate until ready to serve—just toss with beans when serving.
What's the best way to reheat leftovers?
This salad isn't meant to be reheated—it's designed to be served cold or at room temperature. If you must warm it slightly (for a hot meal), microwave for 30 seconds and stir in fresh lemon juice to revive the flavors. The beans will soften more, but it's still delicious!
Can I add other vegetables?
Try diced corn (½ cup), cherry tomatoes (¼ cup), or avocado (add just before serving). For extra crunch, add shredded carrots or red cabbage. Just balance the textures—keep the bean ratio dominant for that satisfying heartiness.